
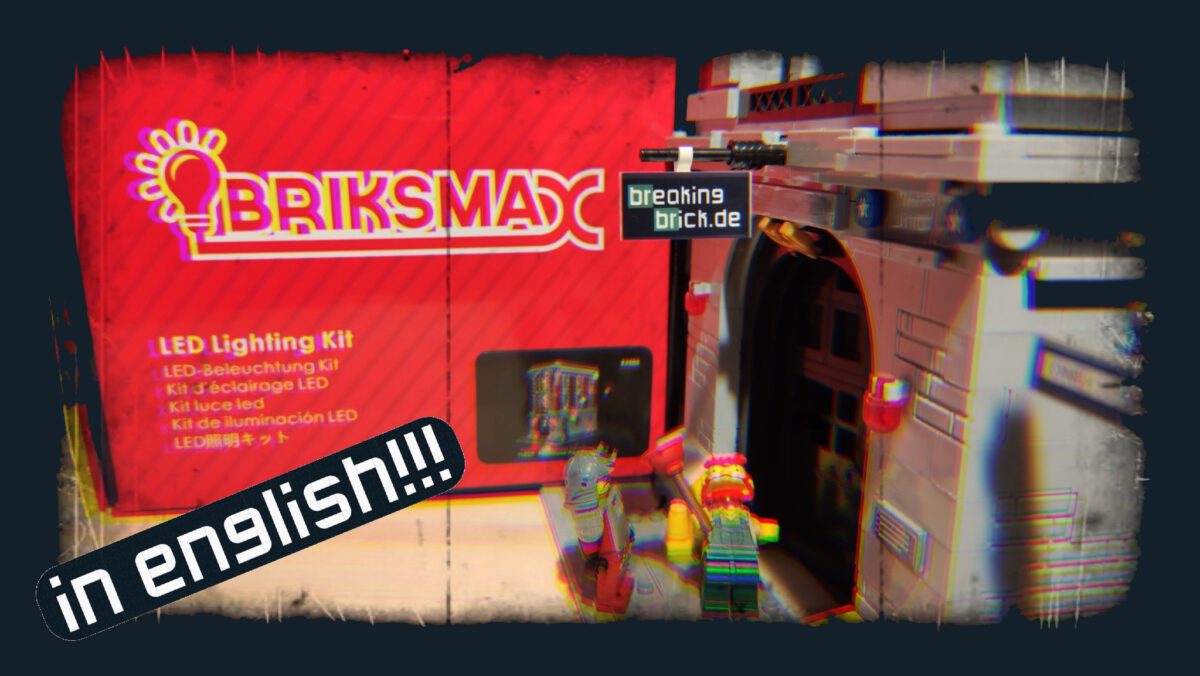
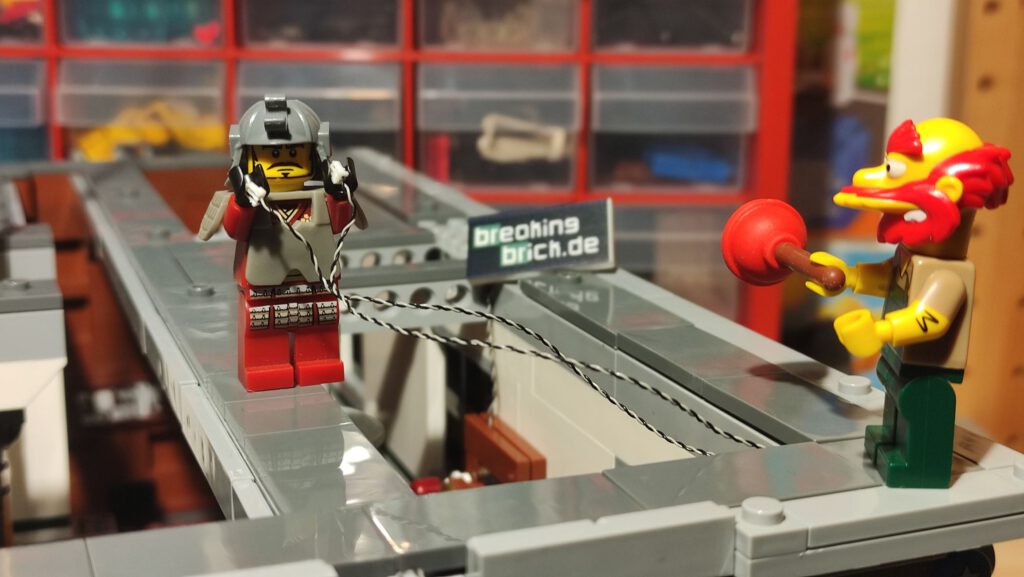
Stay brighter longer, fiat lux or lights off – spot on. Blinking and colorful it’ll now be with my Ghostbusters headquarters of an unknown clone brand from China. Briksmax from China hits the switch in this big building. Come on, let’s become Illuminati!
Warning: Contains ads (got to tell you this by German laws, yawn….)
The blog and an enlightenment
In the past, I was never a big aficionado of lights or illumination in my sets. Neither as a do-it-yourself solution in the early 90s with tiny light bulbs and batteries, nor later with any kind of LED strips and whatsoever. Nope, also no 9V box from Lego. In my eyes they really were only reserved for vehicles of any form. That was huge a no-go for me at that time, if such a room-sized box would have been taken place inside of a building. Besides, I didn’t even had the cables and my parents wouldn’t let me order from Lego Service. Back in the late 1980s or early 1990s. We didn’t even had bricklink!
The first more or less serious lighting stuff came to me with the Sembo Club (SD6991). But I removed it right away, or didn’t install it at all. It simply looked like foreign subjects. To make it clear: The gentlemen’s club was electrified afterwards. It looked really weird – thick cables, only 1 × 4 plates in transclear with some few LEDs. And three fat battery boxes in 2 × 4 × 3. Real cabinet size. Not really suitable at all for the Sembo club.
Gone. No more lights and LED. Sick of it. Until December 2021.
Without the camera, I was working on the conversion from the Ghostbusters HQ to the liquor wholesaler „Held der Weine“ (literally „Hero of Wines„, a pun of „Held der Steine„, a very known influencer within the german brick community). Exactly in that time, I received a message from Lightailing from Mainland China, from their PR representative. If I’m interested to review a set from Briksmax. Would be a lighting set.
Do I even want to be enlightened?
First thought was: thanks but nope! I slept a night over it and then I was somehow triggered and intrigued. Because sometimes you get quite good review articles when you are allowed to write about something that is not in your comfort-zone. Or you have a certain „aversion“ aka love-hate. Then I thought intensively about an appropiate set. I quickly narrowed down a few candidates:
- Volkswagen Camper-Microbus T1 (Lego 10220 – got it twice from Lego!)
- James Bond Aston Martin DB5 (Bela 11010 or Lego 10262)
- Grand Emporium (Rebuilt with Lego from Bricklink and a Zhegao-Set)
- Ghostbusters HQ (Lego 75827 or by an unknown brand with set n° S7302)
- Parisian Restaurant (Lego 10243 or in my case by King 84010)
- Garden Coffee House (Wange 6310)
- AFOL Square (Brickative M017 or by Urge 10190 as Toy Square)
The cars were immediately kicked off the list. Why? Because I don’t get to display them appropriately. Besides, one of the Volkswagen-Microbusses isn’t built yet and the other one is a gift from a close family member who passed away. The unbuilt Microbus I want to review in the future (I’m already looking forward to the whining of some fanboys because of a possible destruction of value). Also, the already-built-up Microbus I don’t want to disassemble for emotional reasons. Thus, the Aston Martin is on my upcoming sales list.
It should be a Building!
The Grand Emporium? Meh, I dunno. Don’t want to. Parisian Restaurant is charming, but the thought afterwards told me not do it. The Garden-Coffee-House by Wange wasn’t available at Lightailing.com (but I would have got it on request, more on that later). AFOL-/Toy-Square? Hell no. I had no idea how the cables should be installed, but I was sure I need less MOC and more off-the-shelf building techniques from Denmark.
The last man standing: The Ghostbusters HQ. The one I’ve already half started to convert into a huge booze dealer. Ok, then that’s it.

If you still want to know more about the Ghostbusters HQ as such, I recommend the Article-Series (explained extensively here on the blog, although in German):
- Purchase & Unboxing (Part 1)
- Instructions & Minifigs (Part 2)
- 1st to 5th building section (Part 3)
- 6th to 11th building section (Part 4)
- 12th to 15th building section (Part 5)
- Review (Part 6)
The plan with the Briksmax-Kit from Lightailing.com
Well, yes, I think you all know how good this planning thing works. Not at all. But what worked was the backfitting to the Ghostbusters-Headquarters on time until the lighting-set has arrived. This worked out quite well. I did it offline as a side quest and isn’t really worth a picture.
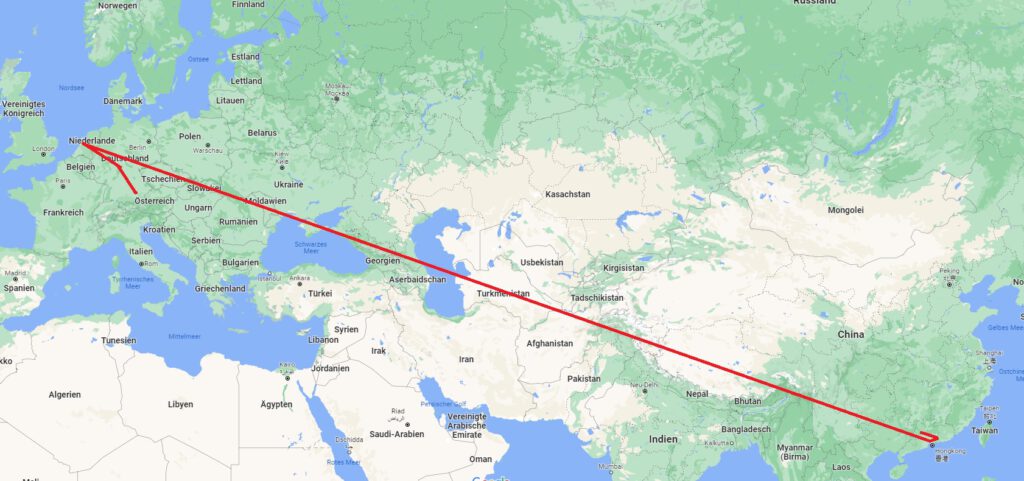
The building was retrofitted two days before I got the box from Lightailing from China.
I had the re-conversion done to its original state on time, two days before receiving the package from Lightailing in China. The set made a small round trip in Guangdong and then flew from Shenzhen to Amsterdam, then via parcel-courier-service to me in the Munich area.
Import sales tax for the European Union has already been paid by Briksmax via IOSS.
Then it arrived and … and was laying around for some weeks. I made the unboxing before new year’s eve. But the conversion with lights as such I started at the end of January.
Unboxing
Somehow weird or strange, there lies something related with bricks in front of you, but it’s different. I was surprised, how compact they crammed it at Briksmax in China, even in the retail-shelf-packing. I let the pictures speak for themselves, afterwards I’ll tell you more:
 From China with love.


My first thought was: No space is wasted here. My second thought was: I would never get this back inside like this. Like to fold back a roadmap in its original shape. Back in the days before we had smartphones and GPS.
Summary of the unboxing of Briksmax BX085:
- Dimensions of the box: 20.5 × 5 × 15.5 cms (8.1 × 2 × 6.1 inches)
- Sealed with tape
- 23 bags with alpha-numeric marking
- 2 bags without marking
- Three printed manuals
Filling of bags:
For starters I was somehow quite confused by the whole concept of Briksmax. Not only because of three building instructions were laying in front of me – more the bags with unusual markings. I sorted the bags by alphabet and numbers in ascending order and put them in a sorting box. Thus, afterwards the overview was given without any problems.
But wait, there’s more! You cannot make any connections between the bags and the building instructions at all. But, they are grouped into letters from A to G and then again divided into numbers. To the detailed content:
| Bag printing | Content |
| A02 | 2 × White LED with 15 cms-cable (5.9″) |
| A07 | 3 × Green LED with 30 cms-cable (11.8″) |
| A09 | 4 × Red LED with 30 cms-cable (11.8″) |
| A10 | 1 × Red LED with 15 cms-cable (5.9″) |
| A11 | 1 × Yellow LED with 30 cms-cable (11.8″) |
| A13 | 2 × Pink LED with 30 cms-cable (11.8″) |
| A32 | 1 × Yellow LED with 10 cms-cable (3.9″) |
| A34 | 1 × Warm-white LED with 30 cms-cable (11.8″) |
| A35 | 5 × Warm-white LED with 15 cms-cable (5.9″) |
| A49 | 1 × Ice-blue LED with 30 cms-cable (11.8″) |
| B01 | 4 × White LED-Strips |
| B02 | 2 × Warm-white LED-Strips |
| B07 | 4 × Warm-white LED-Strips (small) |
| D01 | 8 × 6-port Expansion boards |
| D02 | 1 × 8-port Expansion boards |
| D04 | 3 × Connecting cables with 5 cms (2″) |
| D05 | 3 × Connecting cables with 15 cms-cable (5.9″) |
| D06 | 8 × Connecting cables with 30 cms-cable (11.8″) |
| D07 | 6 × Connecting cables mit 50 cms (19.7″) |
| D09 + G01 | 1 × USB-Cable + double-sides adhesive pads |
| E02 | 1 × AA-Batterie-holder (w/o batteries) 1 × Remote control (w/o CR2025-batterie) |
| F04 | 1 × Flashing-module-board |
| F07 | 1 × Receiver-board |
| Little bag w/o marking | 14 × Various Lego-Plates |
| Large bag w/o marking | 1 × Large black tweezers |
(Conversion-) manual(s)
I can’t emphasize enough on this: Every set wins or fails with the instruction. This also applies to the lighting-set from Briksmax. For me personally, almost an essential point in this area. An approiate rating follows later in the summary for this article.
The instruction consists out of three little booklets (staple-bound), distributed on two transparent sleeves to protect them from debris and physical damage. They remind me strongly of Pixie books (little booklets for pre-schoolers, 10 × 10 cms or 3.9″) from my own childhood (or from my little helper). Only less square and more rectangular.
Enough chitchat, time for some pictures of the instructions and the other included printed works:
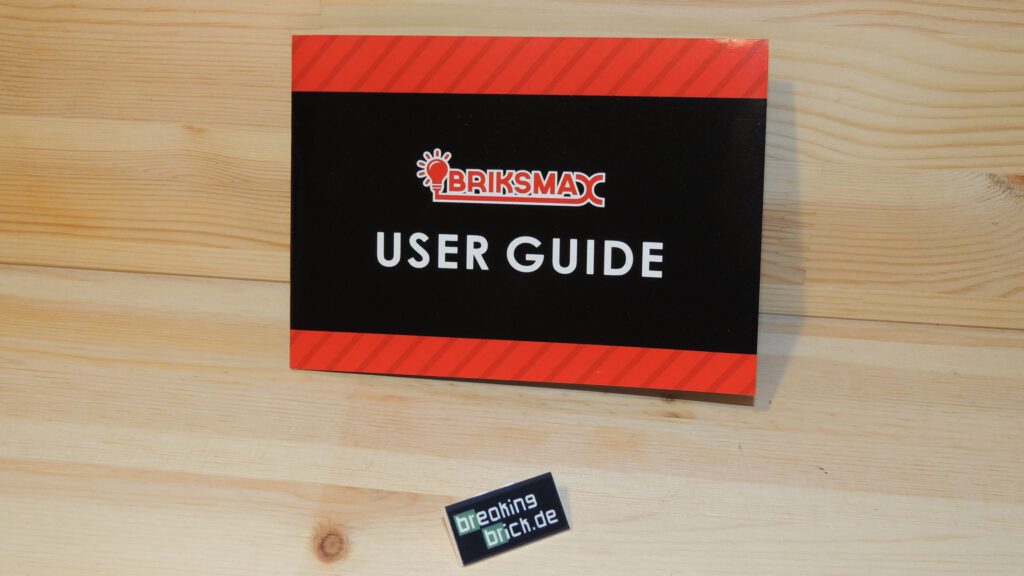
 Instrictions, User Guide & Service Card.


In addition to the instructions, there is also a booklet with many, many warnings. Or other instructions, especially what to do in case of a malfunction. Or, where to ask. The paper has high quality and above all: it’s glossy – it has such a shiny coating.
One thing a builder must be aware of: These aren’t your familiar building instructions as such. There are three illustrated descriptions which function as a three-part conversion instruction. Within these, an explanation is provided where which brick has to be removed in order to lay corresponding cables or expansion boards. Basically there is nothing more to say about the printed works without falling into a rating.
Summary of the instructions:
- 3 booklets („Conversion sections“ if you want)
- 106 pages (N°1 with 38 pages, n°2 with 38 pages, n°3 with 30 pages)
- No parts-inventory (Only online)
- 420 buildingsteps (N°1 with 148, n°2 with 152, n°3 with 120)
- Photographic illustrations
- Numbers and letters indicate the parts
- Arrows occasionally show how cables, expansion boards or LEDs must be installed.
Briksmax guide us: User Guide
I’ll deal here with the „user guide“ separately. I am not one of those people who first study their instructions and warnings. Ain’t always a good idea. Therefore, I would like to suggest to all interested folks to read first the instructions before convesion take place.
The guide comes multilingual (English, German, French, Italian, Spanish, Chinese and Japanese) and contains five chapters:
- Placement of the LED bits (either on or between the studs).
- Application of the self-adhesive strips for LED-strips with the supplied Lego parts.
- Correct cable routing (between the studs).
- Correct connection of the pico-plugs on the light strips.
- Correct connection of the pico-plugs at the expansion ports.
Briksmax also provides an important note about the manual, but only in English. There is stated that the cable color has been changed from black-red to black-light gray. The illustration in the instructions are still with the old color scheme for the cables.
Troubleshooting
Yup, also within the same booklet with 10 pages, there is also a trouble shooting in seven languages. But only three points:
- Check batteries. Whether they are full/charged (rechargeable batteries) and/or if the polarity is correct.
- Check cables. Whether all cables from the LED are connected.
- Check expansion boards for bent pin connectors.
Warning informations
Truely, without warning labels no one could survive (haha). But nothing is printed on the box. Basically does it say: You shouldn’t be an aggressive bull in a china shop. Thus, the plugs must be connected carefully and without using force.
Technical details
The lighting kit from Briksmax has no minifigures, but a few technical details that might interest some enthusiasts.
It runs with a voltage of 4.5 – 5V DC, either via USB or 4.5V battery box (3 × 1.5V AA cells). The connectors were also an old acquaintances of mine. As I’m wasting my time (and money) with old computers in addition to the bricks. The connector-system can also be found on the internet as Pico Connectors, the LEDs have pretty much a light intensity of 500 to 700 mcd (estimated). Unfortunately I don’t have an oscilloscope here at my bench to also measure/test the logic boards accordingly for activity.
Above all, I would’ve been interested to know on which standard the remote control interacts with the receiver logic board. I had already made out the frequency-crystal , but unfortunately it has no info on it.
Quirks at building?
The building phase went on for seven days, so every evening for two to three hours. Mind your steps – that sums it up at best, because even a skilled builder won’t do the conversion quickly easy peasy. As mentioned before, I put the alphanumeric bags in some kind of a file box, put a little bowl for the disassembled parts and another bowl for the Briksmax-parts to be used.
And then essentially I followed Briksmax’s rebuild instructions as best as I could.
Day 1
In the beginning… no, on the first evening I built up to step 47 of the first manual. The introduction escorts one, how the Ghostbusters headquarters must be seperated module by module. For lighting issues, the wiring of the traffic lights was laid. This involved replacing the trans-roundplates with the provided Lego parts (roundtiles in the respective trans-colors). And the pink ectoplasm on the sidewalk in front of the headquarters, too. There I made the first acquaintance with the fact that the cables are really really fine. I know them from the repairs of old mainboards, when you have to bridge traces attacked by battery acid (so called Bodgewire).
Day 2
The work is being done from the bottom up, but it still remains on the ground floor. Some parts of the upper edge of the lowest floor have to be dismantled for cable laying, the red hazard lights next to the house entrance are installed as well as the illuminated Ghostbuster-sign above the portal. I didn’t manage to cover as much as I wanted, but I got as far as step 76 of the first manual.
Day 3
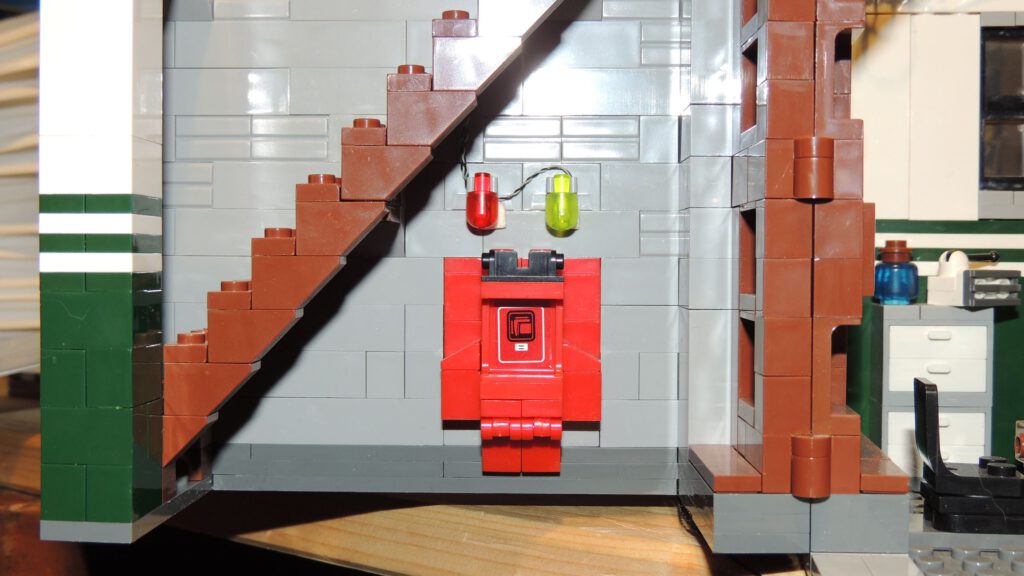
The supplied tweezers came into use. Not that I’m dissatisfied with my own, but the one from Briksmax is almost twice as long. Among other things, I installed a red LED for the alarm bell on the wall on the first floor:
However, also the so important and (unfortunately) hidden LEDs in green and red for the containment unit in the (imaginary) basement. Well, at that place where the trapped ghosts are transferred and stored.
On the said third day, I already had the strange feeling that I might have plugged something wrong. It was already too late for a check. At step 124 of 148 from the first instruction booklet I called it a day.
Day 4
At that day I really made serious progress, it took me about three and a half hours. The ghosts on the side of the second floor (a lost soul in pink and another blue ne’er-do-well). Bzzzzz – they were also electrified. And tackled the second booklet aka instruction, but before that I converted a few ceiling lamps on the first floor.
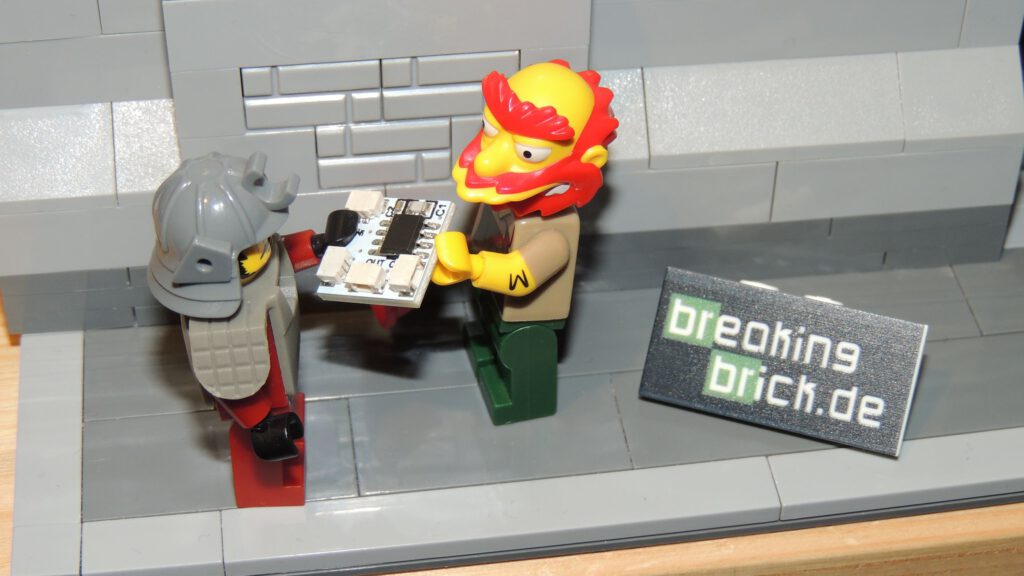
Besides the mentioned ghosts, the first logic board (a tiny board with circuits and electronics) was used. This electronic component controls the fireplace and makes the LED flicker. Step 100 of the second instruction is now reached.
Day 5
Boom, I kept my high level of productivity – the second floor is done. Each one of the floors were always finished with the ceiling lights, which are simply converted ceiling lamps (with dishes) or the light strips with the double-sided adhesive tapes. These are glued to the supplied 1 × 6 plates from Lego on the underside, then built to the ceiling from below.
Basically, I just laid a lot of cables and connected plugs here and there. Along the way I finished the second manual with 152 steps. Little awe I get before the final troubleshooting….
Day 6
Honestly, I was hoping to finish after five building sessions, but the set teached me otherwise. On Valentine’s Day, I made it to the 85th build step of the third booklet of instructions. Below that, I installed (once again) ceiling lights, the popular green slimer along with his red sausage, and the large white logic board with the receiver part. The largest of the included boards has dimensions of about 3 × 3 centimeters (1.2 × 1.2 inches) and is glued to the wall inside the second floor with the help of the small double-sided adhesive pads from the bag marked with G01.

Day 7
Final spurt! The last 35 building steps went quite fast, thus the conversion was finally completed with its corresponding cable leads. Are we done yet?
Troubleshooting
It was definitely not done yet. Because now it was time for the error check or trouble shooting. Not all LEDs were lit. However, this was due to the fact that I had not connected all cables. Not connected was the traffic light as well as the pink ectoplasm on the sidewalk and one or the other ceiling lamp in the side parts.
Especially the followed plug-ins of the light stuff from the outdoor area was anything but fun and really was a pain in the rear. But my rage wasn’t in vain, but I’ll tell that later in the summary for this article.
Remote control features
That’s pain-free.
- Lights on (whole building)
- Lights off (whole building)
- Ground floor
- First floor
- Second floor
- Lights off (again?)
- Brighter
- Darker
If you hold the On-Button longer instead of turning it on at once, the whole building flickers as if haunted by ghosts.
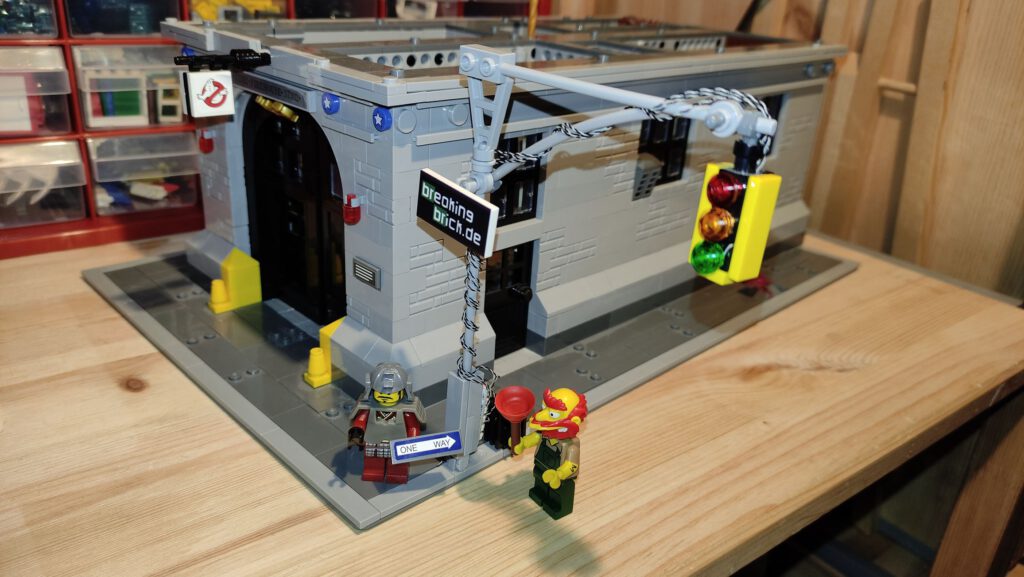
Image gallery of the conversion:
 Forget Ghostbusters. Breaking Brick is now here.


Summary
Breathtaking with a lot of potential for improvement. When everything is finally plugged in and as far as the most important LEDs do their job, then the building looks so freaking good with the LED kit from Briksmax. But the way up to there is hard, with a lot of frustration and absolutely unclear.
A positive view of things
The box, the quality of the parts, the overall print quality of the instructions and even the lockable bags – all high quality. That’s ain’t crap. They even include Lego parts so that the set can also be sold to strong AFOL. Well, I hadn’t expected that, for sure.
Based on the bag markings, it is easy to see that Briksmax has prefabricated the cables and is also using them for other sets as well. Good groundwork by the development team. They even have only to grab components off their own shelf and plan accordingly.
However, this in turn has the disadvantage that some of the cables are often 5 – 10 centimeters (2 – 4 inches) too long. It’s up to the user to decide whether to wrap them several times around an expansion board or to lay out creatively the respective cable, way differently than suggested.
Nevertheless, the thin cables are surprisingly tough, because sometimes I accidentally slipped off the pico plug and pulled on the cable. All strands remained where they should be.
The cables also hold up very well being jammed between bricks, though. After all, at hinges, please consider to use a little more cable in length to avoid physical damage due to bending.
Every coin have two faces
Nonetheless, where’s light, there’s shadow. And you can’t imagine how much I was annoyed at the end during the troubleshooting. First, you can’t get the building-modules apart like before, because the modules are fixed by wires. At that spot, Briksmax could work with contacts between the modules to maintain the modularity. There are some solutions available in the model railroad sector of the industry that can be used.
I was indeed over an hour busy to find the missing cables which weren’t connected. And afterwards then another good half hour to plug them in. Good that my little helper wasn’t with me, I was swearing a lot, nothing for children’s ears…
And that’s where the instructions come into play. Despite the fact that the overall high print quality and the glossy pages (they are really good), the instructions per se aren’t.
They are way too small, the approximate DIN A6 (4 × 6″ Card) in landscape format may be nice for warnings, but for building instructions of a modification project this size simply unsuitable.
Even at the end of certain building steps, there is simply no indication where the plug shall be plugged to which building step. Or vice versa, in building steps with the allocation of the expansion boards, there aren’t any indication from which building steps the cables originate. It was not uncommon for me to blindly plug loose cables into the expansion boards. In good hope.
Size does matter after all!
You can also go back and forth through the instruction booklets, but there is no revelation. Do you know the feeling „What could possibly go wrong„? That’s more or less what happened.
One solution is to include a wiring diagram with upcoming sets and, if necessary, to offer the instructions online besides the print so that they can also be viewed on a wide screen. Especially such a wiring diagram can be very helpful if the building steps are shown also with the corresponding cable-numbers.
Also, a larger manual in size like DIN A4 (Letter) would be extremely helpful, especially with more detailed illustrations. Or better descriptions.
On the other hand, with smaller sets like as a Speed champion, it can fit. They don’t need a wiring diagram, but as soon as it comes to a modular building with several floors or a complex Creator Expert-vehicle like the Microbus or the Aston Martin – there is no way around a wiring diagram.
With Technic sets, the issue wouldn’t be so serious at all, since the cables are installed relatively openly. Troubleshooting is way easier, I assume.
I forwarded all the points after the conversion to the PR-person at Lightailing. She assured, that this will be tackled at Briksmax for the next versions, especially for the large conversion kits. Hopefully it leads to something!
A vulnerable point: The Instruction
A crucial spot for a win or a failure of a set are building instructions. In this case, the illumination or lighting is the savior. It’s so incredibly ingenious and makes it to a bad ass good looker! Really without this shiny bling, it would have failed epic.
After the troubleshooting, (almost) everything lit up. Only some small LEDs in the ceiling on the right side (alley) don’t show signs of life. Four LEDs. I’ll take a closer look when I partially disassemble the building again for the conversion to the liquor-wholesale „Held der Weine“. Because one thing is crystalclear, I can re-use the LEDs perfectly for illuminated advertising on the outside, especially those from the ghosts. Pink, green and blue. Furthermore the red LEDs. Are there bottles in trans-red?
Recommendation to buy?
So, can I recommend this conversion kit? Yes and no. Yes, once they include a wiring diagram and/or the instruction(s) have been improved drastically. No, if the instructions are still „challenging“ and no wiring diagram is included or offered. Yes, if you now already want to have a really incredible well-illuminated building, which really steals your breath in a darkened room.
Pricing
How much does my version of the Briksmax conversion kit cost at Lightailing? It’s currently (5h of March 2022) available at Lightailing.com with a discount for US-$ 58.99 (without VAT). Otherwise, without discount, it would be 84.99 US Dollars. By the way, for buyers within the European Union: Briksmax sums on the sales price the VAT for the respective EU country directly via IOSS. So, it depends where you want to have it shipped.
Shipping costs are already included!
If the US-$58.99 are too pricy for you, Briksmax has other versions on sale for the Ghostbusters HQ to light it up:
- For 59,99 US-$ set n° BX085_2, a light variant of this set (no logic boards, no remote control)
- For 38,99 US-$ set n° LGK85, it’s Lightailings own brand (significantly simpler, but only 28 × LED parts on 1 × 4 & 1 × 1 plates).
Where can I get it?
My version with the set n° BX085 can be obtained here (click on the picture):

Hey, they don’t have my set. Will I suffer eternal darkness?
Nope, no Principality of Darkness. Send details of your MOC or the set you want to have lit up to Briksmax to this email address: support@lightailing.com.
By telling them your set n° or providing them detailed pictures, they can assemble something to drive away darkness. But I have no idea about costs for such a custom-made, can’t help, sorry.
That’s it for this time with a lighting kit and the corresponding conversion. I can’t appreciate enough your time and your attention. Especially for your loyalty!
Feel free to tell me your thoughts and opinions down in the comments, I always look forward to your input. Also, correct me please if you experienced any mistakes in grammar or orthography.
If you liked my work here and you aren’t yet a regular readers of my blog, subscribe on the right side to the newsletter, but you can also follow my content on social media at Instagram, Facebook and also at the germanspeaking forum Noppensteinwelt.de for new articles or small informations around building with bricks.
Stay happy, find enlightenment (if you want), have a good time and keep on bricking!
Gallery for Briksmax BX085:
 Who you gonna call? Ghostbusters!


Hard facts for Briksmax BX085 – Lighting kit for the Ghostbusters HQ from Lego 75827 (or clones)
| Recommended age | from 9 (more 12-16 years) |
| Year of publication | 2021 |
| Price (February 2022) | 84,99 US-$ (w/o VAT) |
| Parts count | 85 |
| Building time | Approx. 8 to 14 hours |
| Difficulty level | Hard to very hard |
| Marking type for parts to be build in a building step | Photographic illustration |
| Type of building instruction | Color printed (staple-bound) |
| N° of pages of the building instruction | 106 |
| Building sections | None |
| Building steps | 420 |
| Parts inventory inside the building instructions | No (only online) |
| Minifigures | No |
| Instructions available as PDF | No |
PS: Do you know what else is missing? A sound module with the iconic song from the motion picture soundtrack: Ray Parker Jr. – Ghostbusters.
Review comment
The lighting kit with set n° BX085 from Briksmax was kindly provided by Lightailing for the review. The words and opinion about the set are my own, there was also no obligation to publish. They already have waited long enough for the review anyway and were very patient, though.